Controlling Motion with Arduino and Servo Motors

Ever wondered how robots move with such precision? Or how a self-driving car adjusts its steering? Often, the magic behind these movements lies within small but powerful devices called servo motors. Coupled with the versatility of an Arduino board, servo motors become incredibly accessible tools for makers, hobbyists, and engineers alike. This article explores the world of controlling servo motors with Arduino, from basic wiring diagrams to advanced applications. We'll demystify the connection process and empower you to integrate precise motion control into your own projects.
Servo motors are not just simple motors. They are designed for precise control of angular position. Unlike regular DC motors that simply spin, a servo motor can be instructed to rotate to a specific angle and hold that position. This makes them ideal for applications requiring precise movement, like robotics, automation, and even camera control. The Arduino, a user-friendly microcontroller, provides the perfect platform to control these servos with simple code and circuitry.
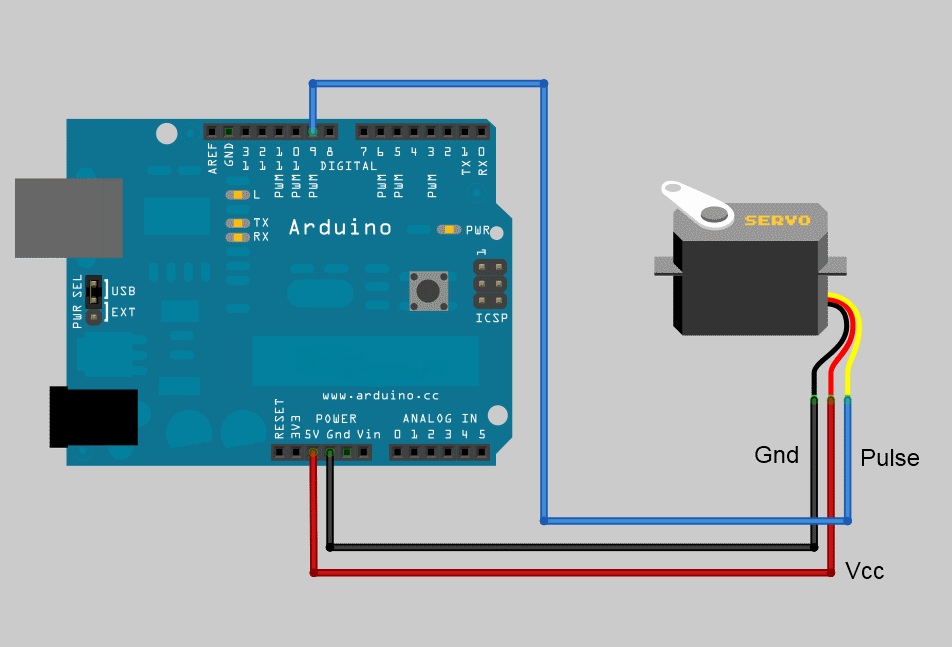
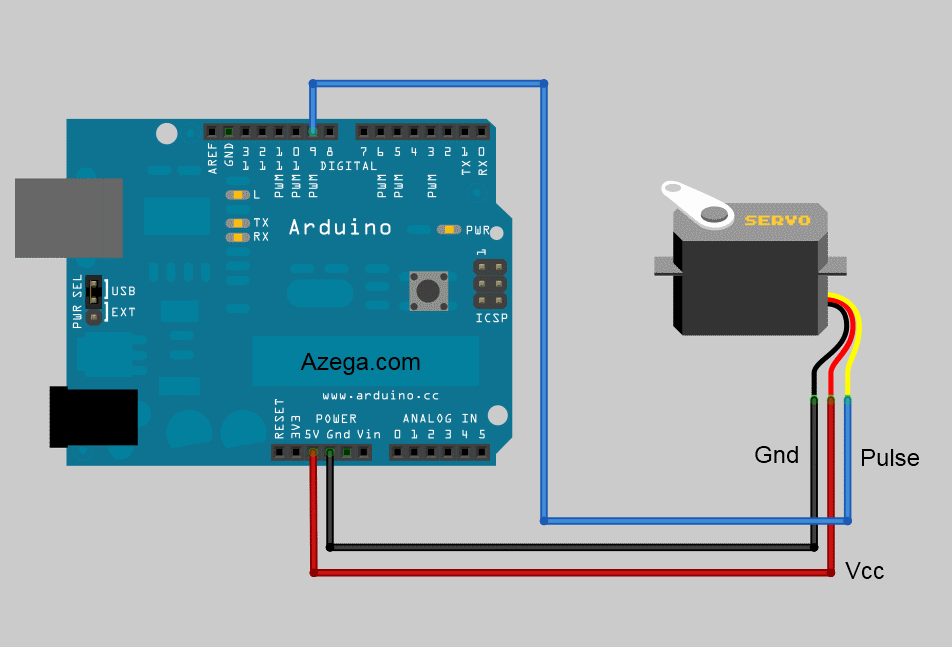
Connecting a servo motor to an Arduino is remarkably straightforward. A typical Arduino servo motor setup involves just a few components: the Arduino board itself, the servo motor, jumper wires, and a power source. The heart of the connection lies within the servo motor wiring diagram, which dictates how to connect the servo's power, ground, and control signal wires to the Arduino's pins. Understanding this diagram is crucial for successful operation.
The history of servo motors can be traced back to the development of control systems for large machinery. Initially used in industrial settings, the miniaturization of electronics allowed for smaller, more affordable servo motors, making them accessible to hobbyists. The emergence of platforms like Arduino further democratized access to servo motor control, opening up a world of possibilities for DIY projects and educational exploration.
One of the main challenges in using servo motors with Arduino involves power management. Servo motors can draw significant current, especially when moving under load. It's crucial to provide an adequate power supply and avoid drawing power directly from the Arduino's 5V pin, which can damage the board. External power sources, coupled with proper grounding techniques, are essential for reliable and safe operation. Understanding these power requirements is fundamental to preventing common issues and ensuring smooth project execution.
A simple example of Arduino servo control is rotating a small arm back and forth. By adjusting the control signal sent from the Arduino to the servo, you can precisely dictate the arm's position. This basic principle can be scaled up for complex robotic movements or adapted to control other mechanical elements. A servo motor circuit for Arduino usually involves connecting the servo's signal wire to a digital pin on the Arduino, the power wire to a 5V or external power source, and the ground wire to a common ground.
Benefits of using Servo Motors with Arduino:
1. Precise Control: Servos offer precise angular control, essential for accurate positioning in robotics and automation.
2. Ease of Use: The Arduino IDE and libraries simplify servo control with easy-to-understand code.
3. Affordability: Both Arduino boards and servo motors are relatively inexpensive, making them accessible for hobbyists and educational purposes.
Step-by-step guide for connecting a servo motor to Arduino:
1. Connect the servo's brown/black wire to the GND pin on the Arduino.
2. Connect the servo's red wire to the 5V pin on the Arduino (or an external power source if using a larger servo).
3. Connect the servo's orange/yellow wire to a digital PWM pin on the Arduino (e.g., pin 9).
4. Upload code to the Arduino that controls the servo's position.
Recommendations: Explore online tutorials and Arduino project guides for further inspiration and assistance.
Advantages and Disadvantages of using Servo Motors with Arduino
| Advantages | Disadvantages |
|---|---|
| Precise Control | Limited Rotation Range (typically 180 degrees) |
| Ease of Use | Power Consumption Considerations |
| Affordable | Can be Noisy |
Best Practices:
1. Use an external power supply for larger servos to avoid overloading the Arduino.
2. Properly ground your circuit to prevent electrical noise and ensure reliable operation.
3. Use the appropriate libraries in your Arduino code for simplified servo control.
4. Test your code incrementally to identify and resolve any issues early on.
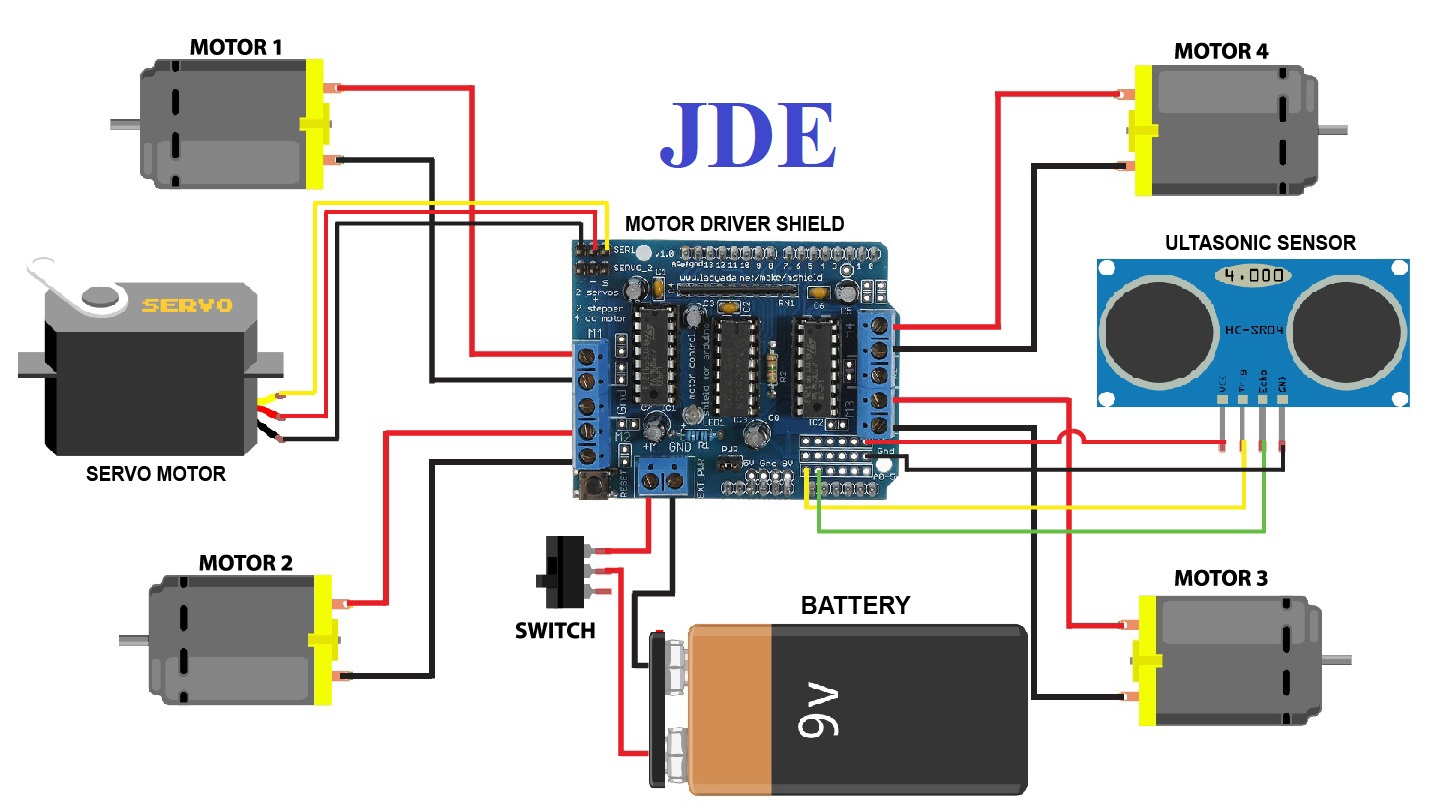
5. Consider using a servo shield if you're controlling multiple servos to simplify wiring and power management.
Real-World Examples: Robotic arm control, automated door locks, camera pan and tilt systems, RC car steering, and interactive art installations.
Challenges and Solutions:
1. Jitter: Solution: Ensure a stable power supply and check for loose connections.
Frequently Asked Questions:
1. What is a servo motor? A servo motor is a rotary actuator that allows for precise control of angular position.
... (Add 7 more FAQs and answers)
Tips and Tricks: Experiment with different servo motor libraries and explore advanced control techniques like PID control for smoother motion.
In conclusion, controlling servo motors with Arduino opens up a vast realm of possibilities for creating interactive and dynamic projects. From simple movements to complex robotics, the combination of Arduino's flexibility and the precision of servo motors empowers makers to bring their ideas to life. By understanding the fundamental principles of Arduino servo control, including wiring diagrams, power management, and coding techniques, you can unlock the potential of these versatile components. The affordability and accessibility of both Arduino and servo motors further democratize this technology, making it an ideal platform for learning, experimentation, and innovation. As you delve deeper into the world of Arduino and servo motors, you'll discover an ever-expanding community of makers and resources, providing continuous support and inspiration for your future projects. Embrace the challenge, explore the possibilities, and continue to push the boundaries of what you can create.
Unleash the beast boosting your 80 series with a front mount intercooler
Unleash powerful audio exploring jl audio 8 inch tower speakers
The functional elegance of the ford f 150 tremors cargo space


